Microsoft Word to GitHub Wiki workflow with Writage
Introduction
This guide explains how to write and edit GitHub wiki pages directly in Microsoft Word using the Writage add-in.
This workflow benefits writers who prefer Word's familiar interface and features while using GitHub for version control and collaboration.
Writage is a Markdown editor add-in for Microsoft Word. It allows users to write and edit Markdown documents directly within Word, making it easier to create and format content for GitHub wikis.
A Markdown document pushed to the wiki repository appears as a new page on the wiki.
Prerequisites
-
The Writage add-in for Microsoft Word
noteWritage includes a 14-day free trial. Afterward, you must purchase a license.
-
An existing GitHub repository with an initialized wiki
Instructions
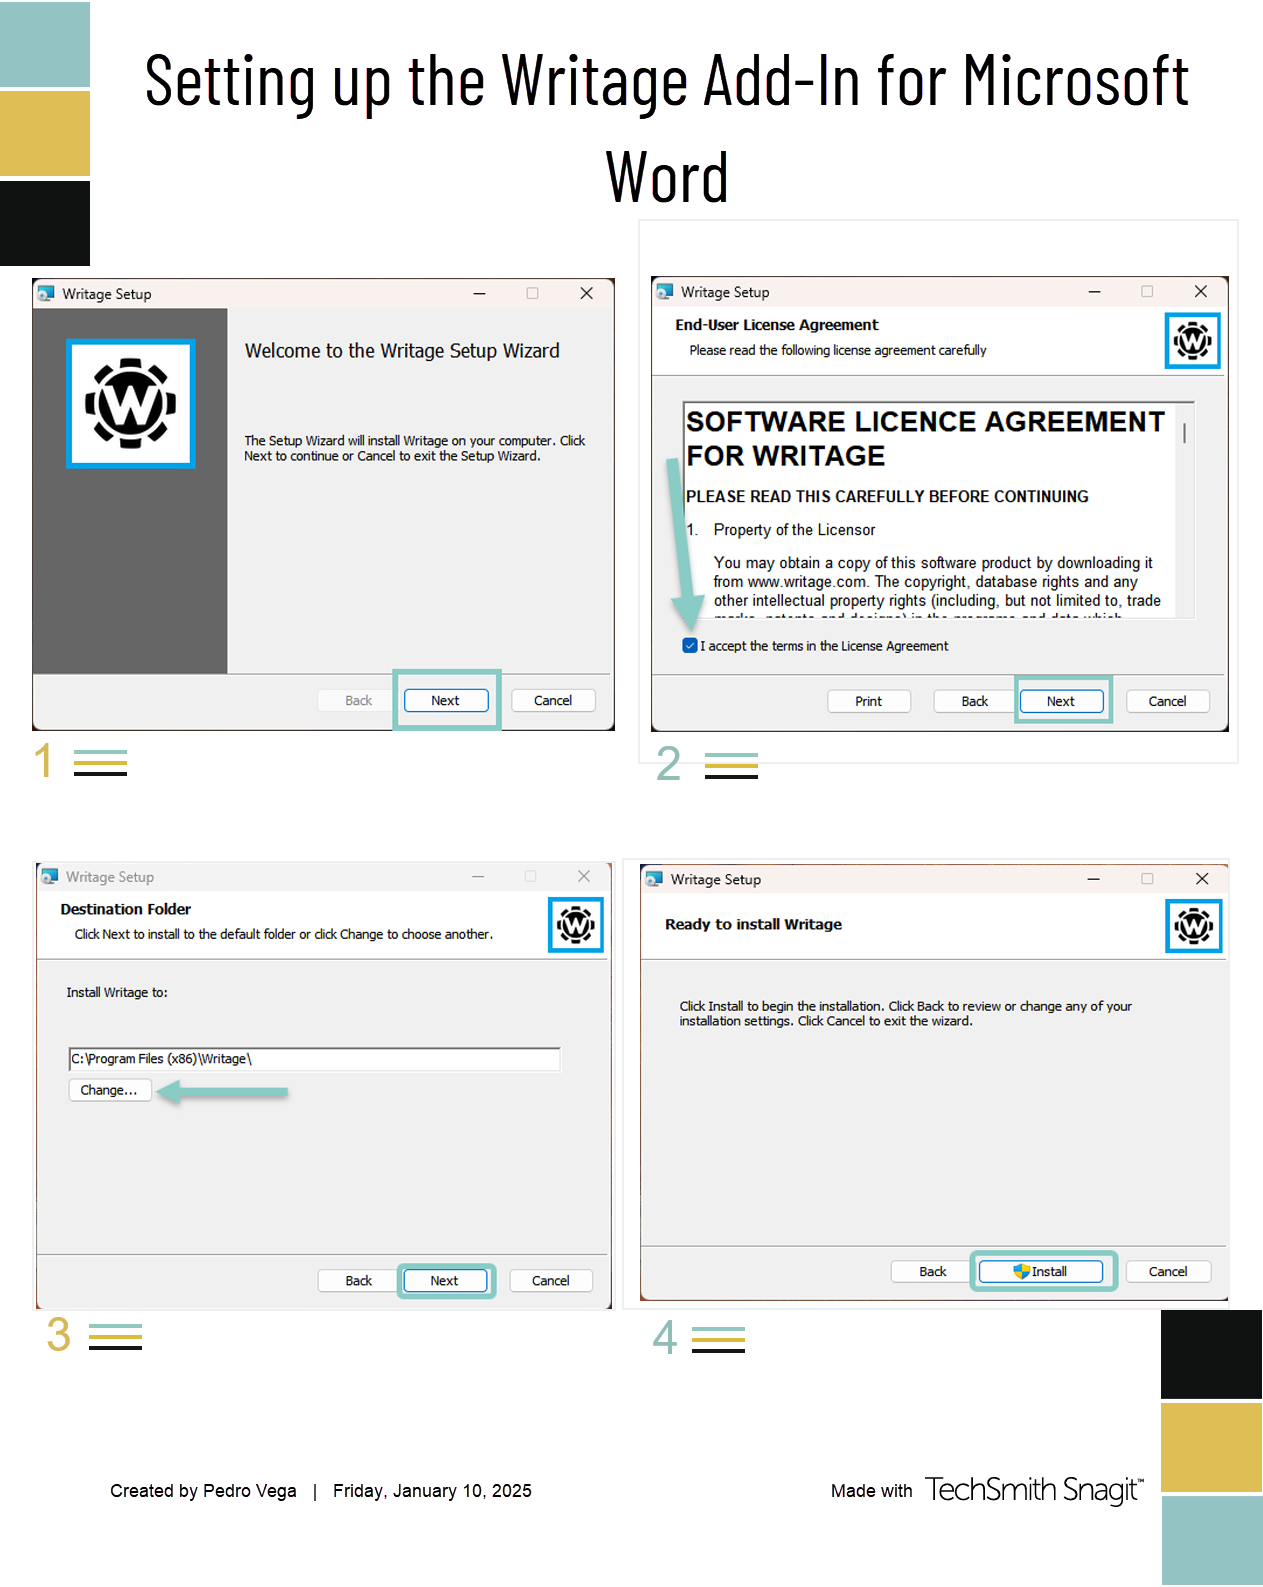
Setting up Writage
- Follow the installation prompts to set up the Writage add-in.
Writage in Microsoft Word
Once you install the Writage add-in, you can write and edit a Markdown document like a regular Word document. With Writage, you can open existing Markdown files directly in Word, and save Word documents as Markdown files.

Cloning a GitHub wiki to GitHub Desktop
GitHub Desktop doesn't automatically clone a repository's wiki. You must clone the wiki repository manually.
-
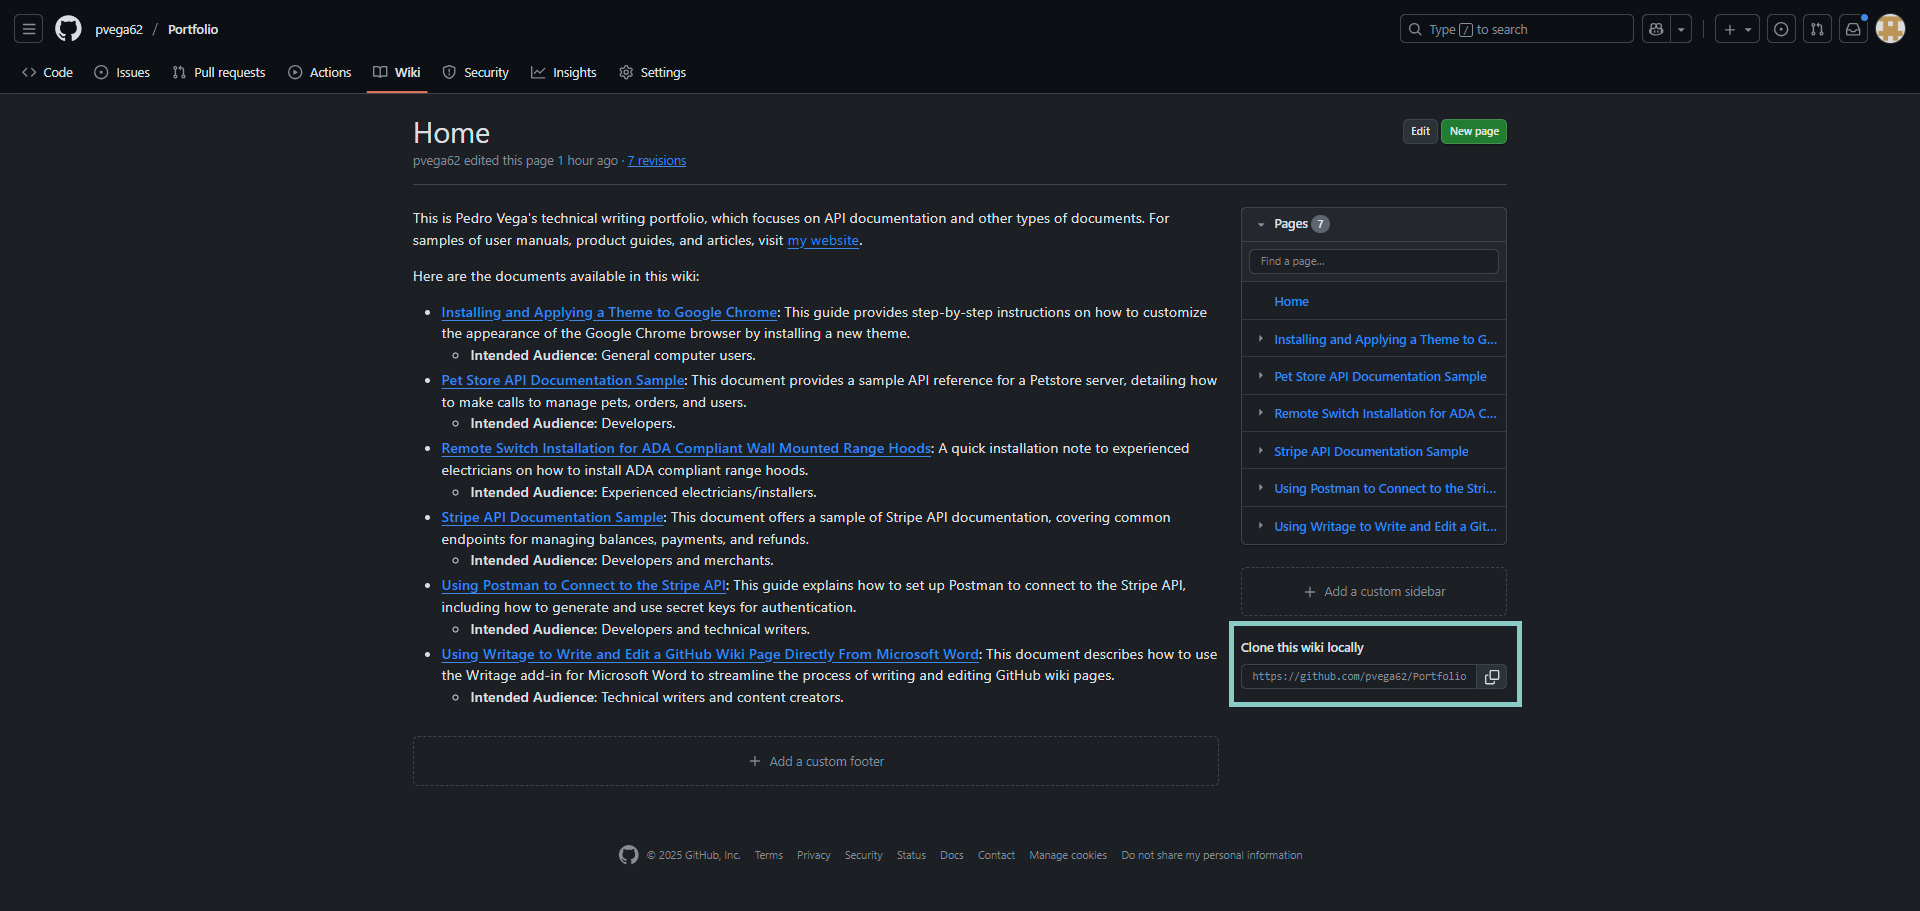
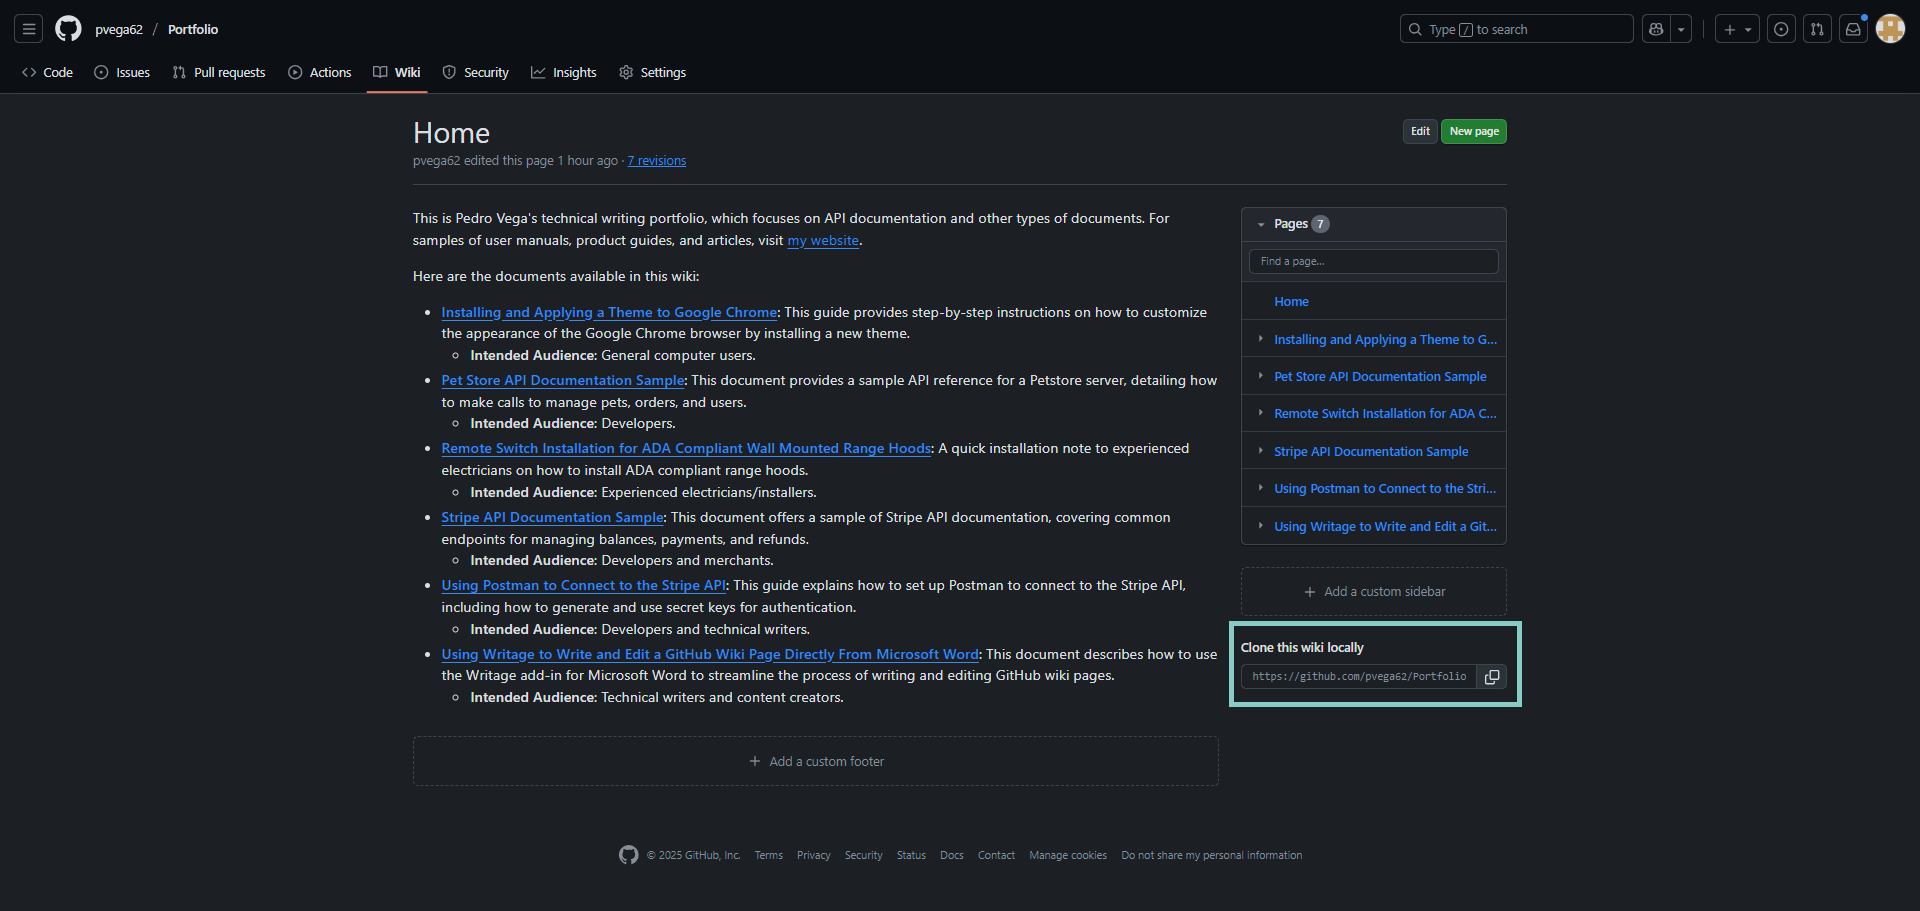
Open the wiki on GitHub and copy the clone URL from the lower-right corner of the page.
-
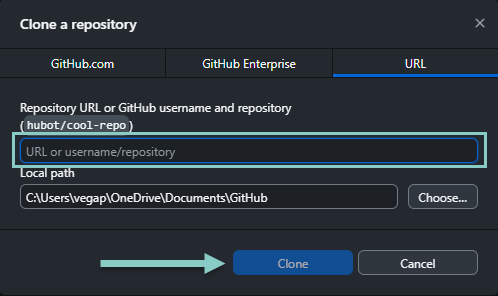
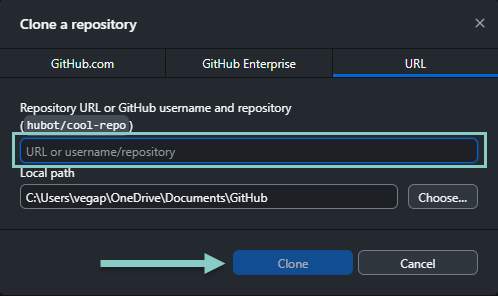
In GitHub Desktop, press Ctrl+Shift+O to open the Clone a repository dialog.
-
Click the URL tab.
-
Paste the wiki URL, then click Clone.
Pushing a Markdown document to a GitHub wiki
After writing a Markdown document in Word, you can push it directly to your GitHub wiki repository. This eliminates the need to copy, paste, and format content in GitHub's web editor.
-
Save the Markdown document into the local directory where you cloned the wiki repository.
-
Open the GitHub Desktop app.
-
Select the wiki repository.
-
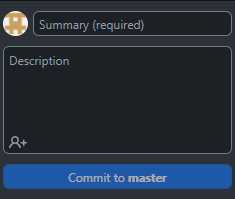
Enter a concise commit summary, then click Commit to main or Commit to master.
noteThe summary describes the document updates, helping other contributors understand revisions without reading the entire file.

-
Press Ctrl+P or click Push origin to push the changes to the wiki.
-
Open the wiki in a web browser to verify the published page.
Repeat these steps whenever you create a new document or edit an existing wiki page.
Converting a Markdown document into a PDF file
- Open the Markdown document in Word.
- Click File > Save As.
- Select PDF in the file format dropdown menu.
- Choose a destination folder, then click Save.